How to Install QA1 GM Pro Coil Shock Systems
How to Install QA1 GM Pro Coil Shock Systems
There’s a list of reasons why people are upgrading to QA1 coil-over shocks on their cars. Improved ride quality, adjustability and ride height are just a few. This process may seem difficult, but we want to show you how easy it is to upgrade to the QA1 GM Pro Coil Shock System coil-overs.
We are installing them on a 1968 Chevelle, but it’s the same process for any year A-Body as well as for many other applications, such as G-Body, F-Body, etc.
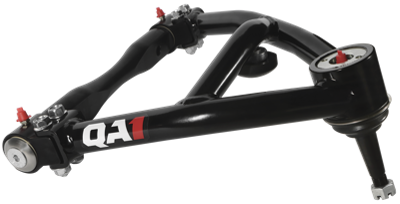
The kit we are showing here is a hybrid coil-over system and comes with the shock, spring, and mounting hardware. A hybrid coil-over works by mounting the spring on the shock – hence, coil-over. The bottom of the spring rests on adjusters that are on the shock body itself, not on a control arm. The top of the coil spring still rests in the factory frame spring pocket. A true coil-over would have a mount on the shock itself. Both offer all the adjustability and upgrades; it’s just a different way of accomplishing the same task.
Preparing for Installation
Our first step to installing the new GM Pro Coil Shock System is to assemble the coil-overs. This is done by threading the adjustment nuts onto the shock body along with the thrust washers or shims. We also recommend applying anti-seize to the threads to prevent galling and to make adjustments easier.
Then we removed the stock shock from the car; it's attached by one nut up top and two at the bottom. From here we loosened the lower ball joint castle nut, and with a few taps of a hammer to the spindle, the ball joint popped loose from the spindle. Go ahead and remove the sway bar end link from the control arm as well.
Before you go removing the lower castle nut completely, you need to secure the coil spring, which is under tension. You could use a coil spring compressor, or in a pinch, you can ratchet strap the spring to the lower arm like we did. The goal here is to safely remove the coil spring, which has lots of tension and can go flying straight at you if you’re not careful.
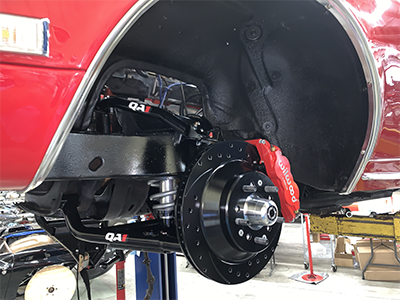
With the lower control arm pushed down and the factory shock and spring out of the way, it’s time to install the QA1 Pro Coil Shock System.
Installation
Begin installation by sliding the coil spring onto the shock body. One quick note here is that the top of the coil spring on the 68-72 GM A-Body cars are ground flat, so you don’t have to worry about indexing the spring. However, for some applications, the springs are not ground flat and will require you to rotate the spring into the correct position on the spring pocket.
With the spring on the shock, we simply make sure the coil spring is sitting correctly in the spring pocket, then slide the shock through the factory shock mount hole and install the nut.
On the bottom of the coil-over, where it mounts to the control arm, there are a few things to note. First is that on some GM applications there are nuts welded to the control arm that have to be removed, but they aren’t here on this '68 Chevelle. Another thing to note is that the factory holes are 5/16” diameter and they need to be drilled out to ⅜” diameter. Lastly, the stock shocks mount to the bottom of the control arm usually. With these coil-overs, you want it to mount to the top of the control arm, the side where the factory coil spring would normally sit.
With the Pro Coil Shock System now bolted into the car top and bottom, go ahead and attach the lower control arm to the spindle and torque down the castle nut before inserting a cotter pin.
The last step is to grab our spanner wrench to set the ride height we want and then re-install the sway bar end link – then hit the back roads!
If you have any questions, please feel free to give us a ring at (952) 985-5675 or shoot us an email.