How to Install a QA1 Mustang Tubular K-member
1994-2004 Mustang K-Member Installation
If you’re looking to replace or upgrade your 1994-2004 Mustang K-member, QA1 has the bolt-in solution. QA1 tubular K-members are lighter and stronger and offer more exhaust clearance than factory Mustang K-members.
Installation of the K-member isn’t terribly hard, but it should be done with a professional, as the weight of the engine has to be lifted and could cause serious harm if done improperly. We completed installation on a lift to show you how it’s done, but this job can be done in your home garage as well.
Removing the Old K-Member
The first step is to disconnect the battery along with unbolting the alternator and swinging that out of the way. We used this spot to bolt in an engine brace that will hold up the engine during the removal of the K-member. You can use a typical engine hoist as well.
Struts for Coil-Overs
After removing the wheels and getting the car into the air, we went ahead and loosened the top of the struts and fully removed the sway bar end links. With a floor jack bracing the lower control arm, we removed the top of the strut and lowered down the control arm.
To gain more room to remove the strut and coil spring, we went ahead and popped off the brake caliper and hung that out of the way. Then we pushed the lower control arm down and used a pry bar to pop the coil spring out of the coil spring pocket.
One thing to note here is that this new K-member doesn’t accept a factory coil spring. We upgraded to an adjustable QA1 coil-over strut that will give us better ride quality and ride height adjustability. With the new coil-over strut installed on the lower control arm, we bolted the top back up and moved to under the car.

Underpinnings
There’s a brace for the factory Mustang K-member that has to be removed – this brace is no longer used with the QA1 K-member. Once that’s out of the way, you can unbolt both lower control arms from the K-member.
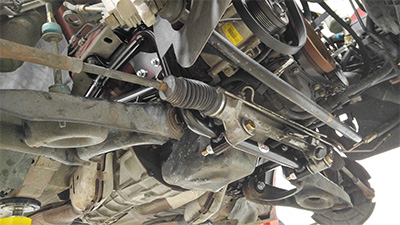
In order to remove the lower control arms, the rear mount bolt will have to be popped out so that you can slide the rear control arm bolt out of the way. In order to remove the front control arm bolt, you’ll have to unbolt the rack and pinion and slide it forward.
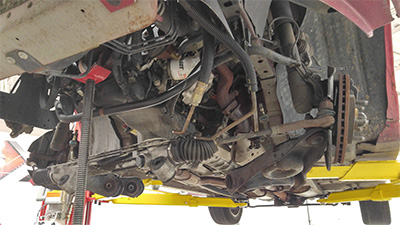
With the rack and pinion slid forward, unbolt the steering column in order to slide the rack off the factory K-member mounts completely. You won’t have to unbolt the tie rods; just let the rack hang in place off the K-member. Then you’ll want to reach in from the wheel wells and unbolt the motor mounts.
At this point, everything has been unbolted from the factory K-member. Here is when you’ll want to remove the weight of the engine from the K-member with either a brace, like we made, or a cherry picker.
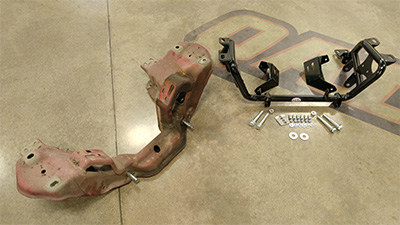
Back under the car, we unbolt the upper frame mount, followed by the lower frame mounts. Make sure to save these bolts and nuts, as you'll reuse them during installation.
At this point, the K-member will come out from under the car. Have a jack or an extra friend to help wiggle it down and out of place safely.

Installation
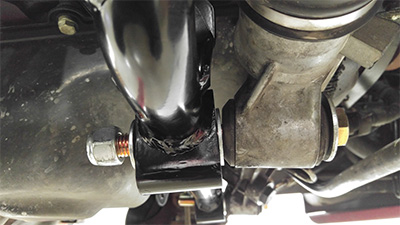
In order to install the QA1 K-member, you’ll have to bolt up the motor mount brackets, which come with the provided hardware.
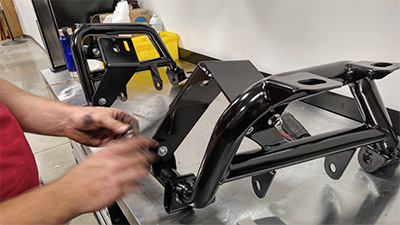
The fun times begin by sliding the new K-member into place. Using the original bolts and nuts, loosely install each bolt before snugging them down. Note that you don’t want these bolts too tight at this point, as you’ll want to perform an alignment check before torquing them down.

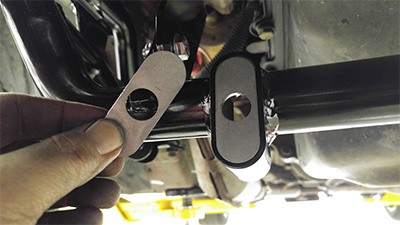
The plugs in the K-member that locate the rack and pinion are different for Fox and SN bodies. Once you determine which you need, slide the plugs into the K-member and use the new supplied hardware to mount the rack and pinion onto the new K-member.
Re-using the factory nut, go ahead and start the nut onto the motor mount bolt. After releasing the tension from the engine brace or cherry picker, let the engine rest on the new K-member, then tighten down the motor mount bolts.

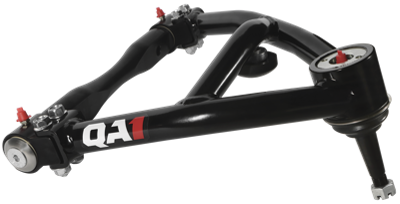
The next step is to reinstall the lower control arms. If you’re using a stock lower control arm, you’ll insert the supplied spacer on the backside of the front mount. If you’re upgrading to the QA1 street arms, you’ll place this spacer on the front side of the front mount. Keep the bolts snug but not torqued; you’ll torque them down once the car is on the ground with the full weight of the vehicle on the wheels. If you do it now, you could experience binding or squeaking.
The last two pieces to reinstall are the steering column and, finally, the alternator and battery connections. With our wheels back on, we headed for the alignment rack.
Final Adjustments
With the Mustang up on the rack, we lifted the front end of the car back up and started taking measurements. Basically, we wanted to make sure the wheel was centered in the wheel well as well as make sure the new K-member was perfectly square in the car.
After double-checking and making sure everything was perfectly aligned, we went ahead and torqued down the K-member bolts for the final time. The last step was to reinstall the sway bar end links, followed by a proper alignment of the front wheels with the new K-member and coil-overs. Remember to tighten down the control arm bolts with the full weight of the vehicle on the ground now too.
If you have any questions, please feel free to give us a ring at (952) 985-5675 or shoot us an email.