Dialing In Your Impala Suspension For The Street
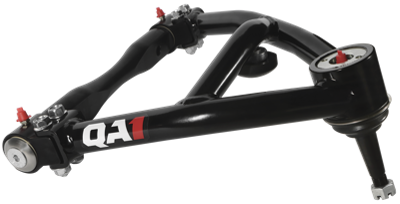
You just refreshed your Impala’s suspension front to back, top to bottom. There are shiny new coil-overs, control arms, sway bars and other goodies begging to be put to use. That’s great, and your car is guaranteed to drive 100% better. But now that 90% of the work is done, it’s time to tackle the final 10% and get the most out of your car’s new setup on the street.
Start by setting your ride height.
Get the wheels and tires that you intend to use installed on the car. At this point, you should set the ride height to your intended stance using the spring seat collars on your coil-overs. This doesn’t take anything more than a bit of time, trial and error. Park your car on a level surface and measure your baselines. Be sure all your car’s major components are installed – especially driveline and interior pieces – and is close to its finished curb weight.
At this point, jack up your car to unload the suspension, loosen the locking collar with a spanner wrench and raise or lower your spring seat collar. Once it’s where you think it should be, use the locking nut to secure the spring seat and repeat on the other three corners. Each time you make changes, roll the car back and forth to help the suspension settle and re-measure your ride heights to make sure you’re where you want to be.
Looking good? Great! Now make sure you have a good amount of clearance all around and your shocks have the appropriate amount of travel. For more details, check out the video below or visit our tech center for more resources.
Next, set your front-end alignment.
One of the major benefits of updated components on your car is the modernized the geometry of the front end. This includes alignment settings that will make your classic driver feel less like a wayward boat and more like today’s street cars. That means improved cornering, more straight-line stability and less “point and pray“ steering. The best way to maximize all of these benefits is with a proper alignment.
We recommend getting your car professionally aligned after a suspension overhaul like this. For your Impala, use the updated specs below to get the most out of your new tubular components on the street. These are different than the stock settings and will make all the difference in driving feel.
- Camber: 0° to -1°
- Caster: 3° to 5°
- Cross Caster: ± .5°
- Toe: .1° to .3° toe in
Get your rear end dialed in.
If you opted for our level 2 or 3 vehicle kit, you now have adjustable upper trailing arms. These allow you to adjust your pinion angle, minimizing driveline bind as you lower the car. It’s typically recommended to run about 2° of pinion angle. That means your rear end should be pointing up ever so slightly and should roughly match the angle between your driveshaft and transmission – albeit in the opposite direction. Start by matching the length of your stock upper trailing arms to get in the ballpark, then shorten or lengthen them as needed. Lengthening them will decrease pinion angle, shortening them will increase pinion angle.
Once you have your pinion angle set, it’s not a bad idea to ensure your rear end is centered side to side via the panhard bar. This ensures your car will track straight down the road. If you matched your new panhard bar to the stock length during install, this shouldn’t be an issue–but it never hurts to double check. Find a fixed point that’s the same on each side of your car to double check the clearances match up. For instance, measuring from the outer tread of your tire to the inside of the wheel well. While this is a good rough estimate, a good alignment or chassis shop can give you a much more precise measurement.
Adjust your shock valving.
Now that all your components are installed and measured appropriately, it’s time to hit the road and get to the fun stuff. Most of our Impala kits include single or double adjustable coil-over shocks. That means you have the ability to tailor the ride quality of your car to your tastes and needs. How you make these adjustments will depend on which shocks you have and how you want the car to behave. Just be sure you’re matching the adjustments side-to-side on your street car, so count those clicks.
Single-adjustable coil-overs
For this category, things are pretty simple. Each shock will have one knob that adjusts your compression and rebound valving at the same time. If you want the ride to be firmer and give you a sportier feel with improved handling, twist the adjustment knob to the right on each shock. If you want the ride to be softer, twist the adjustment knob to the left.
On the street, valving adjustments ultimately come down to preference, but here are some baseline settings to get you started:
Front shocks
- Drag racing: 0-6 clicks
- Comfortable ride and handling: 2-8 clicks
- Sporty ride & improved handling: 8-12 clicks
- Aggressive handling: 13-18 clicks
Rear shocks
- Drag racing: 0-6 clicks
- Comfortable ride and handling: 0-6 clicks
- Sporty ride & improved handling: 6-12 clicks
- Aggressive handling: 13-18 clicks
Double-adjustable coil-overs
With double-adjustable shocks, you’re able to do exactly that—adjust two different shock valvings independently of each other. You can tune compression without affecting rebound and vice versa. This flexibility gives you the ability to make very nuanced changes to suit your driving style, road surface, environment and more. Double-adjustable shocks really shine if you plan to track your car, whether at the drag strip, road course or autocross.
Similar to the single-adjustable shocks, here are some baseline numbers to help you get started:
Front shocks
- Drag racing: 12-16 clicks compression, 0-4 clicks rebound
- Comfortable ride and handling: 2-8 clicks compression and rebound
- Sporty ride & improved handling: 8-12 clicks compression and rebound
- Aggressive handling: 13-18 clicks compression and rebound
Rear shocks
- Drag Racing: 0-6 clicks compression, 4-10 clicks rebound
- Comfortable ride and handling: 0-6 clicks compression, 2-8 clicks rebound
- Sporty ride & improved handling: 6-12 clicks compression, 8-14 clicks rebound
- Aggressive handling: 13+ clicks compression, 14-18 clicks rebound
Remember: This is your car. Tune it your way.
While the recommendations above offer a solid baseline, you should always make your car what YOU want it to be. You’re the one who drives it, loves it and has a vision for what it should be. But we’re also here to help you achieve that dream. Feel free to reach out to our tech team with any questions. We’ll be sure to point you in the right direction.
Join our #goDRIVEit group on Facebook to meet other enthusiasts who do just that—get out and drive their cars, anywhere and everywhere. Check out our Muscle Car Suspension Hub to meet other folks who are looking to get the most of their vehicles on the street, strip and track.