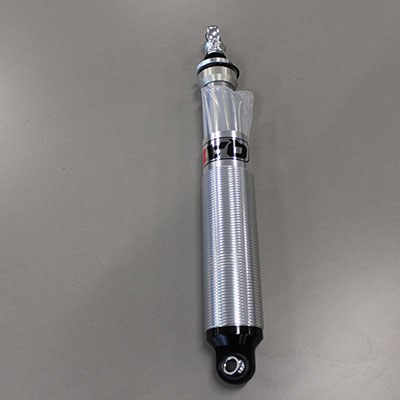
Rebuilding A QA1 Circle Track Twin Tube Shock
Rebuilding A QA1 Circle Track Twin Tube Shock
Rebuilding QA1 twin tube shocks is not hard. After a season of hard racing, it’s a good idea to rebuild them with fresh fluid and look for any pieces that may need to be replaced.
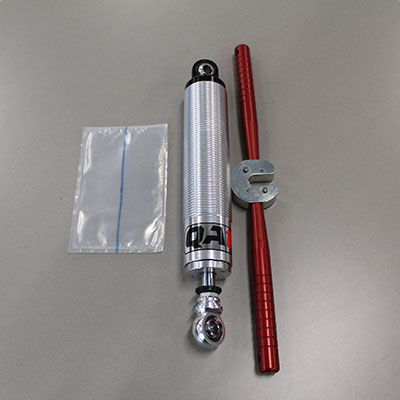
Required Tools
There are a few specialty tools you’ll need in order to properly rebuild a twin tube shock. The first is a shock vise. Now, this isn’t 100% needed, and you may be able to hold the shock with a traditional vise, but a real shock vise is going to be the best way to secure the shock while working on it to prevent damaging the shock body in any way. If you do use a traditional vise, do not do so without some type of soft jaw in place.
The other tools you’ll need are a closure nut wrench, a small pick, a soft blow hammer and compressed air. Fresh oil might be required as well, depending on the age and condition of your shock.
Disassembly
The first step is to properly secure the shock. Then, grab your closure nut wrench and unthread the closure nut at the top of the shock body. Slide the closure nut up the shaft and out of the way.
Inside the shock body is the closure nut O-ring. Carefully remove this with a small pick and slide it to the top of the shaft with the closure nut. Generally you’ll want to replace this O-ring as a precautionary measure.
Now you can grab the piston rod and wiggle it back and forth while pulling up, and it will slide out of the shock body. With the piston rod out of the way, reach inside the shock body and remove the compression tube, then dump all the oil out. Reaching back inside, you’ll want to remove the gas bag from the shock body.
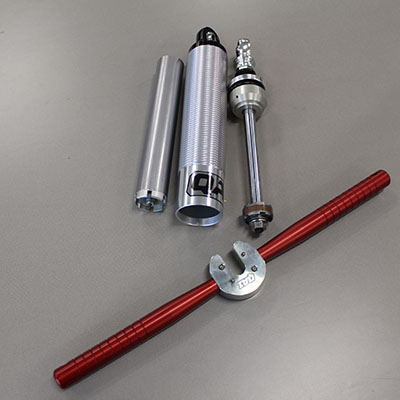
Note – in some cases, the compression tube will need to be removed from the gland. This can be done with a few taps to the gland with a soft blow hammer.
Finally, you’ll want to drain all the oil out of the shock body. If you’re rebuilding the shock, take the time to get a brush and clean out the inside of the shock body, and use a degreaser to get the shock body clean along with the compression tube and gas bag.
Before starting the reassembly process, you’ll need to pop the seal out of the gland assembly. This is easily done by using some compressed air. Simply hold the assembly and apply a good amount of air to the hole in the assembly, and it will pop right up.
Assembly
With the compression tube and gas bag cleaned up, wrap the bag around the compression tube and then slide the assembly into the shock body. Take your time to make sure that the bag doesn't slide under the base of the compression tube or stick out above the compression tube – if it is, the bag will eventually rupture.
Now you’ll want to add shock oil to the shock body. It doesn’t matter where you pour it; you just want to fill the shock body until the oil is roughly ¼” above the compression tube.
Grab the piston rod and slide the assembly slowly into the compression tube about 1" to 1.5” into the compression tube. While holding the piston rod assembly, grab a rubber mallet and tap the end of the rod half a dozen times. This allows the discs to open on the piston and any trapped air to escape.
While still holding the compression tube down inside the shock body, you’ll want to stroke the piston rod up and down a few times. Not the entire length, but about 1” or so half a dozen times. You’ll see and hear the air bubbles coming out of the oil. Now the shock is bled of air.
Slide the piston to the top of the compression tube while holding the compression tube down. Then push the rod to the side to keep it at the top and slide the gland assembly all the way down. This will cause the piston to slide down into the compression tube a tiny bit.
At this point, do not slide down the gland seal or remove any oil. Hold the gland down and slide the rod all the way back to the top. This extra oil will prevent air from getting into the shock. Then slide down the gland seal.
Now you’ll want to remove the excess oil at the top using either a rag or a suction bottle. It doesn’t have to be 100% dry of oil,; you just don't want a puddle at the top. Then slide down the closure nut O-ring and install it into the O-ring groove. The last step is to slide down the closure nut and tighten it down.
With everything reassembled, pull the rod all the way out again, then compress it all the way down. If there are any dead spots, that means you have air inside the shock. If you compress the shock the whole way and the rod pops back out, that usually indicates the basevalve is too soft for the compression valving on the piston.
If you have any questions, please feel free to give us a ring at (952) 985-5675 or shoot us an email.